Check atomiser on your vape, what to do for each type of kit
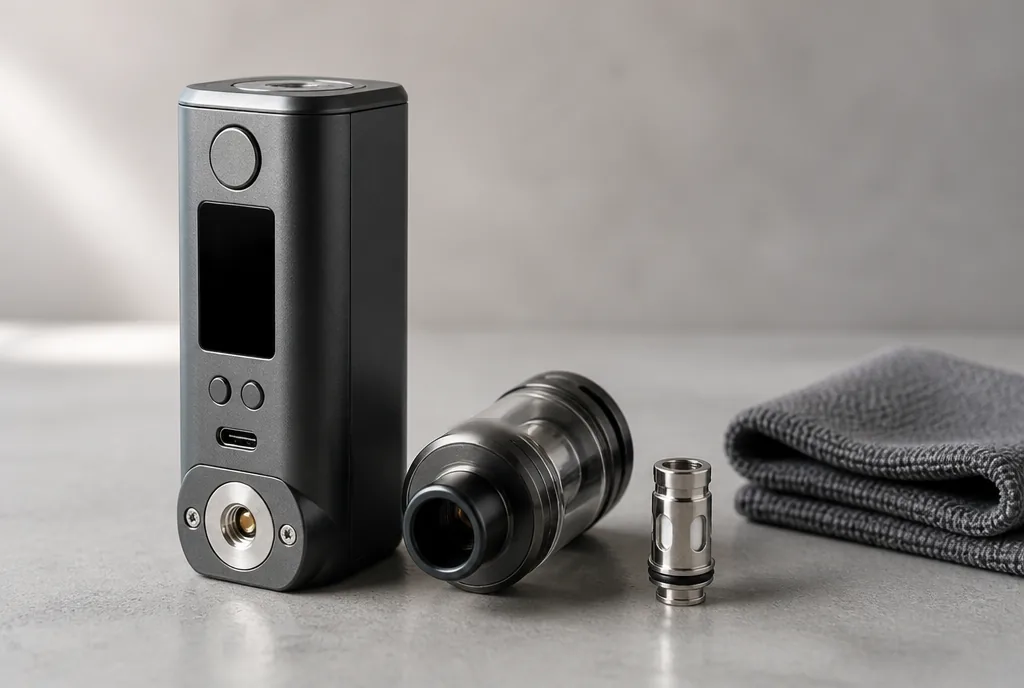
You press the button and, instead of firing, the screen shows a check atomiser warning. The message is blunt, it says nothing about the cause, and most help pages treat every vape as if it were fixed the same way. Yet the right move is not the same on a pod kit, on a mod with a tank or on a rebuildable setup. The real question is where to start, and when to stop and hand the device over.
Check atomiser, what your device is telling you
The check atomiser message means the device's electronics cannot detect the coil, or will not accept it. Without a reliable reading, the chip blocks firing as a safety measure.
The causes described by manufacturers and retailers fall into three groups: a poor contact (a coil not screwed home, dirty threads, a damp connector), a coil that has failed (broken wire, factory defect), or a coil resistance the device will not accept.
The order of checks, on the other hand, depends on the hardware. Starting at the right end saves time and avoids buying a part that was never at fault.
Check atomiser, check coil, no coil detected, one family of alerts
The wording depends on the brand and on the chip inside the device. Depending on the model, the same family of alert reads "Check Atomizer", "No Atomizer", "Check Coil" or "No Coil Detected", spelt the American way on screen. They all point to the same finding, namely that the device cannot make a reliable electrical connection with the coil.
Two other messages normally follow a different logic. "Atomizer Short" points to a short circuit and "Atomizer Low" to a resistance reading judged too low. Some brands still group several of these cases under one label, while others split them further.
Your device's manual, which lists its error messages, remains the only reliable reference. The method below applies to the whole family of alerts.
Fixing a check atomiser warning on each type of kit
Three kinds of hardware, three ways to proceed. Before opening anything, check that the device is charged, empty the tank (2 ml at most on a UK kit, the legal cap for a refillable tank) and work with dry hands. Confirm each step with a short draw before moving on.
Pod kits, reseat, clean, compare
On a pod kit, the coil is built into the pod or clips into its base, and current flows through two small contacts. Take the pod out, check that no e-liquid is sitting on those contacts, wipe them with dry, soft paper, then push the pod firmly back into place.
If the alert persists, try another pod or a fresh coil. If the device works with it, the original part was at fault. If nothing changes with two different pods, suspicion shifts to the device itself.
Many pod kits have no screen and signal the problem with a light. Geekvape's FAQ states that, on its pod systems, three red flashes mean no atomiser is connected, and that the pod or the coil should then be changed.
The same FAQ describes a test for when the light flashes eight times, which involves removing the pod and pressing the fire button. If the device then flashes three times, the coil resistance is too low and the coil needs changing; if it still flashes eight times, the connector needs cleaning. Codes vary from one brand to another.
Tank kits, the coil and the threads
On a kit pairing a mod with a tank, the coil screws or pushes into the base of the tank, which in turn screws onto the mod's 510 connector. Unscrew the tank, then the coil, and look at the condition of the threads and the centre pin.
Greasy or oxidised threads can be enough to break detection. Wipe them with a dry cloth, or a barely damp cotton bud for stubborn residue, and let everything dry. Then refit the coil straight, screwed in firmly but without forcing it, or pushed fully home, depending on the model.
A cross-test settles the diagnosis. If the message clears when you fit another coil, or a tank you know works, the part you removed is at fault. Our guide to the Vaporesso Target 100 and its GTi coils covers a kit of this type, mod and tank together.
A new coil is primed before the first draw, with the cotton soaked in e-liquid, the tank filled and a few minutes' rest.
Rebuildable atomisers, the build comes first
With a rebuildable atomiser, the coil is built by hand on a deck. Check that each leg of the wire is clamped tight under its screw and that no strand touches the body of the atomiser. A broken wire or a loose leg is enough to trigger the alert.
An ohm reader or a multimeter settles the question before the atomiser goes back on the mod. A reading of "OL" means an open circuit, in other words a broken or loose wire. If these measurements are unfamiliar, have the build checked in a shop.
Is the coil compatible with the device
A coil in perfect condition can trigger the message if its resistance falls outside the accepted range. Every mod and pod kit accepts only a band of resistances, given in the manual and on the manufacturer's specification sheet. A very low or very high value may not be recognised.
On the tank side, only the coil series designed by its manufacturer fit properly. Check the exact reference before buying.
In temperature control mode, the mod relies on the coil's cold resistance, and the wire type matters (stainless steel, nickel, titanium). A setting that does not match the wire fitted skews the reading.
When the fault lies with the device
If two new coils or two new pods trigger the same alert, the device becomes the main suspect. Vaporesso's online FAQ sets out a five-step procedure for its "Check Atomizer" and "Short Atomizer" messages, starting with these four:
- clean the 510 pins of the atomiser and of the device;
- change the atomiser or the coil to see whether the device is at fault;
- confirm that the atomiser or coil is properly seated;
- restart the device.
The fifth step is a finding rather than an action. Water, an e-liquid leak or a drop can damage an internal component or the circuit board. At that point, nothing done at home replaces a return to the shop or the manufacturer.
A firmware update, where the manufacturer publishes one for your model, can also change how detection behaves. For an after-sales claim, note the exact message and the parts you have already tried.
Stop using the device, without pressing the button again, if it runs unusually hot, smells of burning, has liquid inside the mod or has a swollen or damaged cell. Contact the shop or the manufacturer, and never open up the electronics.
Stopping the message coming back
Dirty or damp contacts come up in every procedure above. Wipe the threads and the 510 pin each time you change a coil, fill the tank without letting e-liquid run onto the base, and tighten without overdoing it.
Choose coils from the series designed for your tank, with a resistance inside your mod's range.
FAQ
The questions that come up when the message appears, with short answers.
Can a brand-new coil show check atomiser? Yes. A coil straight out of the box can be screwed in badly, carry a manufacturing defect or belong to a series that does not suit the tank. Refit it carefully, then try a second one before suspecting the device.
Does a worn coil trigger the message? Not through gunk alone. A tired coil mostly gives a burnt taste or dull flavour. The message appears when the wire finally breaks, because the circuit is then open and the device detects nothing.
Can I keep vaping despite the check atomiser warning? No. The alert triggers the device's safety system, which blocks firing until the coil is detected properly. Look for the cause rather than pressing the button again and again, especially if the message mentions a short circuit.
What wattage should I use after changing the coil? The range printed on the coil or its box, starting at the bottom and climbing in small steps. Too much power on a fresh coil scorches the cotton, a fault unrelated to detection but just as annoying.
How do I know if the battery is the problem? A low battery usually triggers its own message or a distinct light code, described in the manual. Test again after a full charge. If runtime collapses, the device gets hot on charge, or a cell is swollen or has a damaged wrap, stop using it and contact the shop.
Check atomiser, the takeaway
The check atomiser message is a safety measure, not a verdict on your kit. The device cannot detect the coil, or rejects its resistance, and blocks firing until the problem is dealt with.
On a pod kit, reseat the pod, clean the contacts and compare with another pod. On a tank kit, check the threads and the coil, then swap parts. On a rebuildable, inspect the build and measure it.
If two new parts fail, or the device has been wet or runs hot, hand it over to the shop or the manufacturer. In other cases, a methodical check usually clears a check atomiser warning, and the same principle, look before you replace, runs through all our hardware care advice.
Related reading
- Vaping in Paris, keeping your kit working away from home
- Vaping in Lyon, restocking and looking after your kit
Editorial content for information only, intended for an adult audience. Nicotine is a highly addictive substance, and nicotine vaping products are not for sale to anyone under 18 in the UK. This article is not a purchase recommendation.
More to read
Vaporesso Target 100: the complete UK kit guide
Vaporesso Target 100 explained for UK vapers: checked specs, GTi coil wattages, AXON modes, the 2 ml iTank and how to choose and handle the cell.